If you have been putting off learning how to create a blog post in WordPress because it looked complicated, I want to clear something up right now: it is not complicated. It is actually one of the most straightforward things you will do inside the WordPress dashboard. The hard part is not the platform. The hard part is knowing what to write, how to structure it, and how to make sure it actually gets found by the people you are trying to reach.
That is exactly what we are going to cover here. This is the step-by-step method we teach at The Digital Engine, used by hundreds of students building their first inbound marketing websites. By the end, you will know not just how to click the right buttons, but why each step matters for your content marketing strategy.
Why Blogging Still Drives Inbound Marketing Results
Before we get into the mechanics, let us address the question you might already be asking: is blogging still worth it in 2026? The short answer is yes, and here is why. Search engines still reward fresh, relevant, well-structured content. Every blog post you publish is another indexed page, another chance to rank for a search query your audience is already typing. Unlike paid ads, a blog post can keep bringing in traffic for months or years after you write it.
That is what we call an inbound asset — content that works for you while you are doing other things. A well-written blog post is one of the most efficient investments you can make in your digital marketing system.
Step 1: Log Into Your WordPress Dashboard
Start by navigating to your site’s admin login page. That is usually yoursite.com/wp-admin. Once you are in, you will land on the Dashboard, which is your command center for everything that happens on your site.
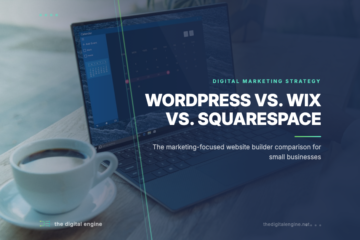
If you are still setting up your site and not sure what WordPress even looks like, you may want to read our post on WordPress vs. Squarespace vs. Wix first. It gives you important context for why WordPress is the platform we recommend for anyone serious about inbound marketing.
Step 2: Navigate to Posts and Add New
In the left sidebar, you will see a menu item called Posts. Hover over it and a submenu appears. Click Add New. This opens the WordPress block editor, also known as Gutenberg.
You will see a clean, white canvas with a field at the top that says “Add title.” That is exactly where you start. Your title is one of the most important pieces of SEO real estate on the entire page, so do not treat it as an afterthought.
Step 3: Write a Title That Includes Your Target Keyword
Before you write a single word of content, you should know what keyword phrase you are targeting. This is your focus keyphrase — the specific search query you want this post to rank for. Pick something specific, something your audience is realistically searching for, and make sure it appears naturally in your title.
A good format: descriptive benefit + your authority frame. For example, “How to Create a Blog Post in WordPress: The Digital Engine Method” tells the reader exactly what they will learn and signals that there is a real methodology behind it. It is not just another generic tutorial.
Keep your title under 60 characters if possible. That is where search engines start truncating it in results pages, and you want the full title visible.
Step 4: Write Your Content in the Block Editor
The block editor works by stacking content blocks. Every paragraph you type becomes its own block. When you need a heading, you add a Heading block. When you want a list, you add a List block. It feels a little strange at first if you are used to a traditional word processor, but you adapt quickly.
Here is the structure we recommend for every blog post you write:
- Opening paragraph: State what the reader will learn. Use your keyphrase naturally here — ideally in the first 100 words.
- Body sections with H2 headings: Break the post into clear sections. Each section should address a distinct point or step. Use your keyphrase in at least one H2.
- Practical examples or tables: Abstract explanations only go so far. Give readers something concrete to apply.
- Closing or call to action: Tell the reader what to do next. That might be reading a related post, subscribing to your email list, or downloading a resource.
Aim for at least 1,000 words. Not because word count is magic, but because useful, thorough content is usually longer. If you are genuinely teaching something well, you need the space to do it right.
Step 5: Add Your Internal and External Links
Links are one of the things that separate a blog post that gets results from one that just takes up space on your server. You need two types.
Internal links are links to other pages or posts on your own site. They keep readers on your site longer, help search engines understand your content architecture, and drive people deeper into your funnel. Aim for at least one internal link per post.
External links are links to credible sources elsewhere on the web. Linking to authoritative sources (like Moz’s on-page SEO guide or Yoast’s WordPress SEO documentation) signals to search engines that you are engaged with the broader conversation in your field. It also builds reader trust. Do not be stingy with outbound links out of fear that people will leave — a reader who finds value in your content and your recommendations is more likely to come back.
Step 6: Add Your Featured Image
In the right-hand panel of the block editor, you will see a section called Featured Image under the Post tab. Click Set featured image. You can upload a new image or select one from your media library.
Your featured image shows up in blog rolls, social media previews, and search results. It needs to be compelling enough to earn a click. At The Digital Engine, every blog post gets a branded featured image with consistent visual design. That consistency builds brand recognition over time.
When you upload your image, add alt text that includes your focus keyphrase. Alt text is what screen readers use to describe images to visually impaired readers, and it is also read by search engine crawlers. One more small signal that you are writing about what you say you are writing about.
Step 7: Fill In Your SEO Settings
If you have the Yoast SEO plugin installed (which we strongly recommend for every WordPress site), you will see a Yoast panel below your content. This is where you set your focus keyphrase, meta description, and SEO title.
Your meta description is the 120-140 character summary that appears under your title in search results. It does not directly affect rankings, but it absolutely affects click-through rates. Write it like an ad headline: lead with the benefit, include your keyphrase, make someone want to click. Keep it between 120 and 140 characters.
Your SEO title can differ slightly from your on-page title. Format it as: Your Main Title | The Digital Engine. Yoast will show you a live preview of how it will look in search results.
Step 8: Write Your Excerpt
Scroll down past the Yoast panel and you will find an Excerpt field. This is a short 1-2 sentence summary that appears in your blog roll on the homepage and category pages. It is separate from your meta description, though you can use similar language.
Keep it punchy. You are selling the click from your blog archive page. Give readers just enough to understand what they will get and why it matters to them.
Step 9: Save as Draft and Review
Before you publish anything, save it as a draft and preview it. Click Preview in the top-right corner and look at your post the way a reader will see it. Check that your headings break the content up logically, your links work, your images load, and the reading experience feels smooth.
This step sounds obvious, but it is easy to skip when you are excited to get something published. A broken link or a missing image on a published post costs you reader trust that is hard to earn back.
Step 10: Publish (and Tell Your Audience)
When everything checks out, click Publish. WordPress will make your post live and assign it a permanent URL (your permalink) based on your title. That URL is now indexable by search engines, shareable on social media, and linkable from other pages.
Publishing is not the finish line. It is the starting line. Once your post is live, share it across your social channels, include it in your next email newsletter, and consider whether there are older posts on your site where it makes sense to add an internal link pointing to this new one. The more pathways that lead to a post, the more likely it is to be found.
The Bigger Picture
Creating a blog post in WordPress is a technical skill. But the real skill is building a content system where every post serves a purpose in your inbound marketing strategy. Each post should target a specific search query, serve a specific audience, and connect to the rest of your content through a network of internal links.
That is the difference between blogging and inbound marketing. One is a task. The other is a system. And the system is what builds the kind of compounding digital presence that drives traffic, generates leads, and creates long-term business growth without requiring a paid ad budget to sustain it.
If you are ready to build that system from the ground up, start with our guide on inbound marketing fundamentals or explore the full curriculum at The Digital Engine.


0 Comments